*please note there are no affiliate links in this blog post. I simply add links to patterns or tutorials that I used to make things.
Fall and winter of 2021 was a season of so much crafting for me! It was really fun and productive. Many projects were to spruce up my home for the holidays. There were also a few gifts made!
Here are just nine things I’ve made in the fall and winter of 2021
Starting from upper left corner, here is my finished Three Witches by Barbara Ana Designs. This was so fun to stitch and I finished it onto a board from Michael’s with some spooky ribbon, a wooden mushroom from Germany, some large rick rack, and mounted the stitching on a piece of chipboard with a fabric covered board behind it.
The next two photos are three punch needle ornaments from an issue of Punch Needle and Primitive Stitcher Magazine. I used floss I had on hand, including some fancy flosses and finished the ornaments with wool trim. I have a little pencil style artificial tree I keep up year round and I had it all decked out with autumn decor.
Middle row left is a photo of my spooky owl lantern, designed by Christopher Hiedeman. I love watching his YouTube videos, whether they’re about his beautifully decorated Victorian home or a tutorial on making something vintage-looking. I found his video on how to make this paper mâché looking owl and loved creating it. The eyes are so brightly colored in this photo because there is a battery operated tea light inside the lantern. It looks so neat on the front porch with other autumn decor.
In the very center of the collage is my finished and framed Feast of Friendship cross stitch by Blackbird Designs. I am in love with this piece and am so happy with the framing. I purchased the design and flosses at Stitchville USA in Minnetonka, MN and also had them do the framing. I had coffee-tea dyed the 28 ct. Monaco fabric myself and I’m very happy with the overall look of the piece.
The little heart ornament on the bottom left is just a creation I made after browsing thru Pinterest and seeing a similar felt and needlework ornament.
Bottom row middle pic is my finished Merry Chalkfull cross stitch which is one of several design collaborations between Priscilla Blain of Stitching with the Housewives and Cathy Haberman of Hands on Design. This was a gift for my mother-in-law. I’m trying to make all of the Chalkfulls for her.
And the last pic is of my Christmas tree cones made with poster board and yarn and some little pom poms. I see these in stores and I refuse to pay for something I can easily make on my own with supplies I have on hand. I did have to buy school grade poster board, as the only board I had was too heavy to be manipulated.
Seems like a lot of crafting, right? It was! But that wasn’t all. In my next post, I will go into detail how I made a painted sign for my bedroom for Christmas decorating.
(I get no revenue from any links. I simply add links if you need to see a pattern or product or video I have used.)
I was talking with some online knitting/crochet friends via Hangouts the other day and we were talking about quilts. We somehow got on the subject of string quilts and I mentioned that I was saving all my fabric scraps from making face masks and will eventually incorporate them into a quilt project of some sort. This of course led me back to Pinterest, my favorite site, to look at all the beautiful string quilt projects out there.
This happened before, and that perusing became quite productive, as I did actually make a string quilt top, which is still in my storage room in a container. Hmmm…that’s not where I intended for it to land, and how many years ago was this?? So I got to thinking about all the neat projects I have started–and not finished. And I decided it’s time to finish up, or give it up, if I’m not feeling it.
I started with a basket I keep right at my feet in my craft room. It contained two table runner projects, one pieced and quilted with some homespun fabrics, one put together with just three fabrics, and quilted in a basic diamond design, a pair of knitted socks in need of repair, and a small punch needle of a fish that needed its final finishing.
The first of these I tackled were the homespun quilt, which was either going to be a table runner or a wall hanging. It was literally so long ago that I cannot possibly remember! I was inspired by a quilt book called Fast, Fun & Fabulous Quilts published by Rodale Press. The quilt was called Stars and Scraps Forever by Judith Hughes Marte.
I was in a hurry apparently, when I attempted to bind this quilt I made, because I believe I used prepackaged red bias binding and either didn’t take the time to learn how to properly attach quilt binding, or I just didn’t care. (Sometimes I get in that mode of not caring too much–I almost always regret it.)
So I had to remove the terrible red binding, then I found some black fabric in my stash, but it didn’t feel like 100% cotton, more like a stiff cotton blend. I made single fold binding and attached it like a pro, thanks to this wonderful YouTube video by Fons & Porter. Then came time to sit and hand sew the binding to the back of the quilt. Since it’s not a large piece, it didn’t really take too long. I did have some difficulty with pulling my thread through the new binding fabric, so I conditioned my thread with Thread Heaven. It’s a great product to have around.
And here is the finished quilt!
Next, I had to repair my hand knitted socks. These socks, called Tuscany, are by designer and sock earth angel Melissa Morgan-Oakes, who is a best selling author. I purchased her book Toe Up Two At a Time Socks after borrowing a copy from my library and realizing I needed it in my own personal library for ever. I have made a few pair from this wonderful, fully instructional book. I highly recommend this book if you wish to knit socks two at a time, with all the information you need for sizing, fiber choice, etc. There are several wonderful sock patterns in just one book. (I do not receive any commission whatsoever for providing links.) All I had to do was better reinforce the toe. I don’t know what yarn this was but I wasn’t thrilled with it. The stitch pattern does look really nice, but I felt that the yarn might not hold up to my needs around heels and toes. Now that I can wear them instead of staring at them in disrepair, we shall see how they hold up!
Next I wanted to “final finish” my little punch needle of a fish. I probably started this project about 3 or 4 years ago, then finished the punching while living here in Minnesota. Then I didn’t fully finish the project, but rather stuck it in that basket under my desk. This little design came from a pack of 9 iron-on transfer designs in American Folk Art style by DMC. I had completed one other one from this collection and framed it in a shadow box for a dear friend. So I found a little $3 frame months ago that I thought would be a good piece for displaying finished needlework of some sort. I unwrapped it, but soon realized it was not going to work, as my punch needle piece is really a rectangle, while the frame is definitely square. I tried to make it work, with ribbon, etc, but I just wasn’t feeling it. So I proceeded to attach the punch needle work to a small piece of sticky board, and silly me, when I went to reposition the work on the sticky board, some threads stuck to the sticky board and came right out of the work! Arggh!! A short string of profanity followed. Then I had to dig out the Russian punch needle, the hoop and embroidery floss and fix what had come out. Luckily this great little design is very forgiving in that there are so many lovely blues and greens and even tans and grays in the water portion that you don’t need to be precise with color placement. I had it fixed in no time, then instead of repeating my mistake again, I went to the window to help me line up the needlework on the sticky board, and then simply folded the extra monks cloth fabric to the back, added a few magnets and boom–I now have a fishy magnet.
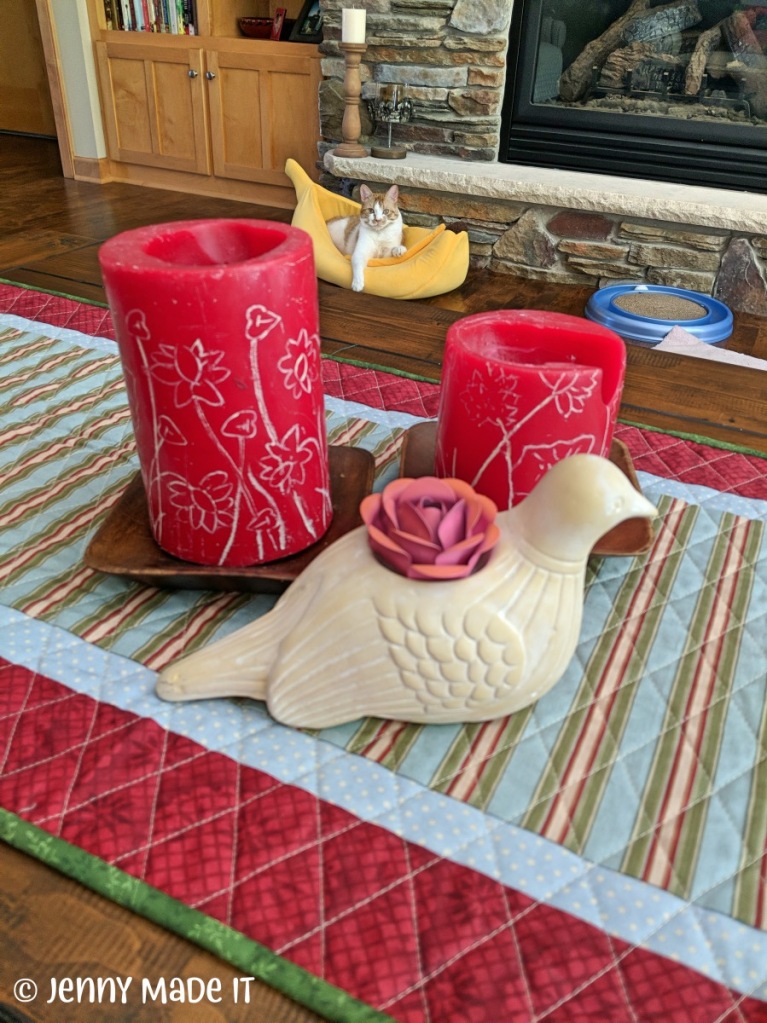
Lastly, I had another table runner project to finish. Again, I cannot remember when I made this, but it never had a binding, so I did purchase the green fabric before the quarantine and lock down went into effect, so I simply made single fold binding out of 2 1/4″ strips of the fabric. I did not cut bias binding, but rather, cut on the grain, because I knew I would not have any curvy parts to bind. Again, I used the Fons & Porter video mentioned above to attach the binding with such a great finish. It’s a bit fiddly to finish it off but it works like a charm.
I realize my green thread doesn’t match well but you don’t even see it! I love the wonder clips by Clover for holding the binding in place just a few inches away from my hand sewing. I also use the clips when I’m sewing face masks with fabric ties. They are great! I can highly recommend.
I just have to show off this funny photo of the finished piece in my living room with our youngest cat, Dewey, hanging out on his banana. 😉
Thanks for stopping by! I feel pretty good about getting these projects completed. Now I will have to dig out the larger quilt projects I have in my storage area that need finishing and decide how to proceed. I hope you have a wonderful day! — Jenny