It’s always stitching season!

Disclaimer: I get no benefit from providing links to websites with products or ideas. I simply add them so you can find things if you’re interested.

Hi everyone! Sorry I’ve been so incredibly lame when it comes to updating this blog. Here’s what I’ve been working on lately.

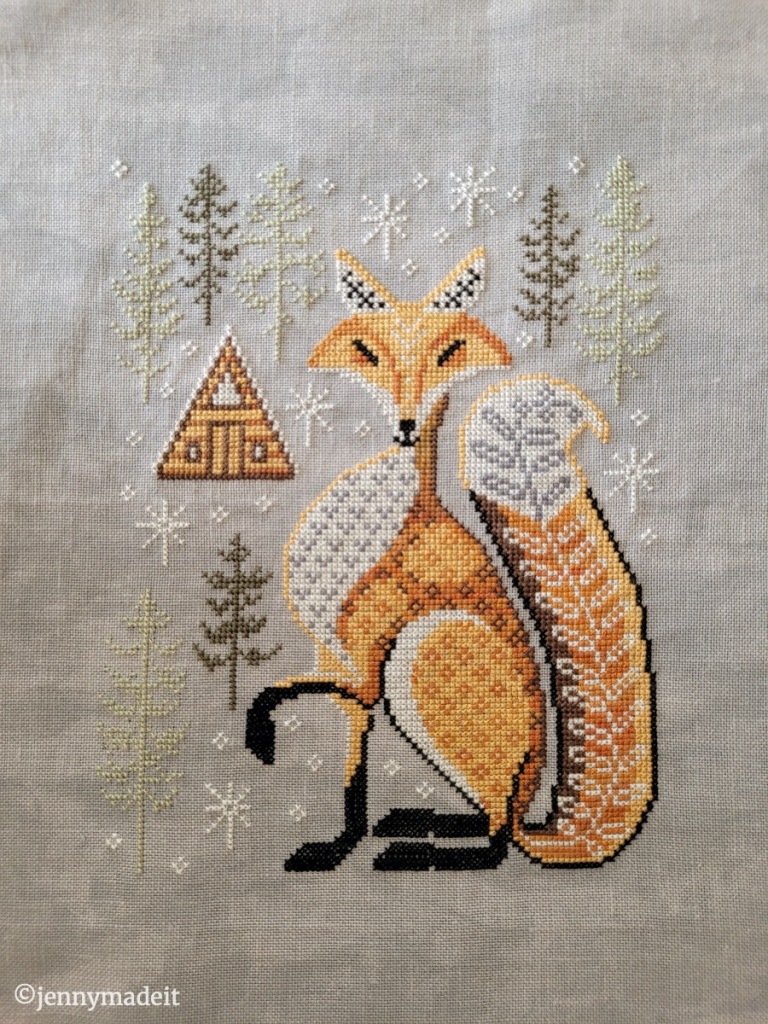
I’ve just finished stitching my first A Year in the Woods cross stitch. Here is The Fox by Cottage Garden Samplings. I stitched mine on 40 ct Newcastle Stormy Night. I purchased the pattern, the fabric and the called for threads at my local needlework shop, Stitchville USA.

I have very limited experience with 40 count linen and let me just say, I do love stitching on it. You need only one strand of 6-strand floss, and your stitches look so nice. I do need a magnifying lamp to stitch. I actually look through the magnifier in order to stitch.

The finished cross stitch of The Fox.

I have purchased The Woodpecker and The Little Brown Bat. I’m not sure when I’ll start them, but I know they will all be stitched on 40 ct linen. I would love to do all of them in the collection. They are all so beautiful to me.

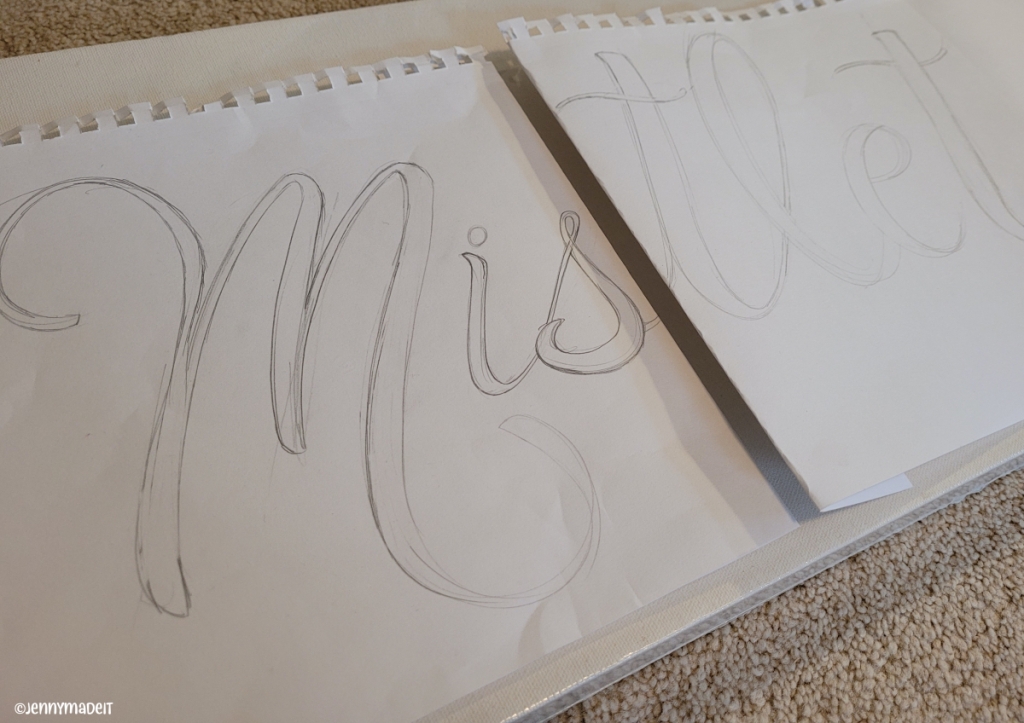
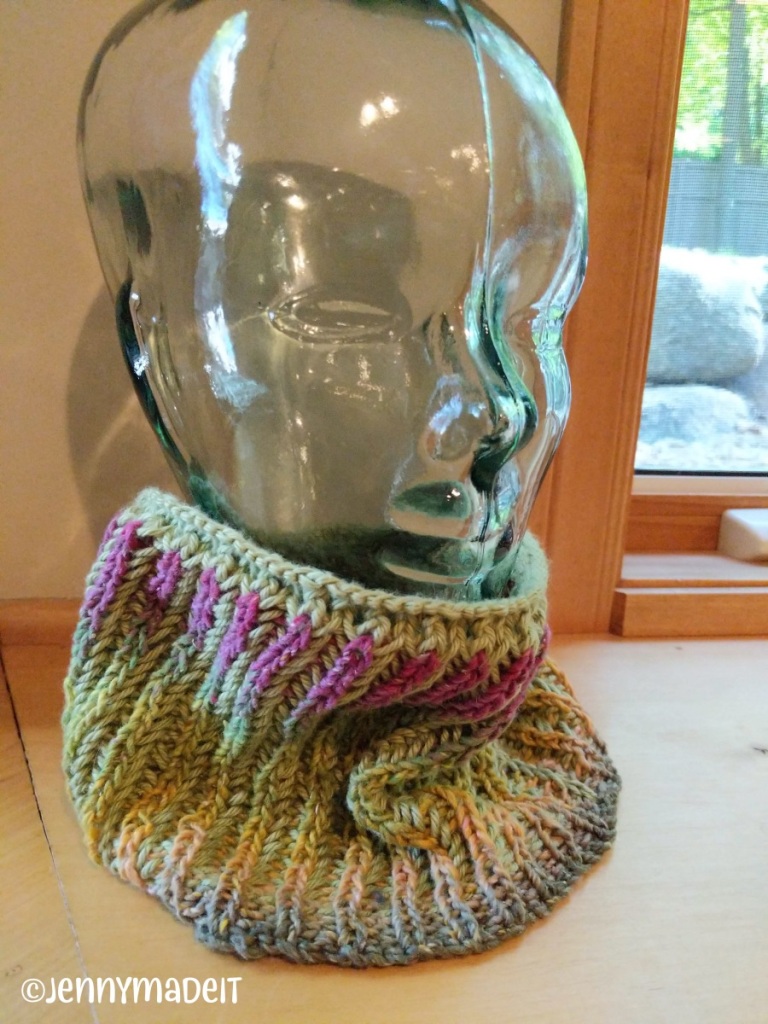
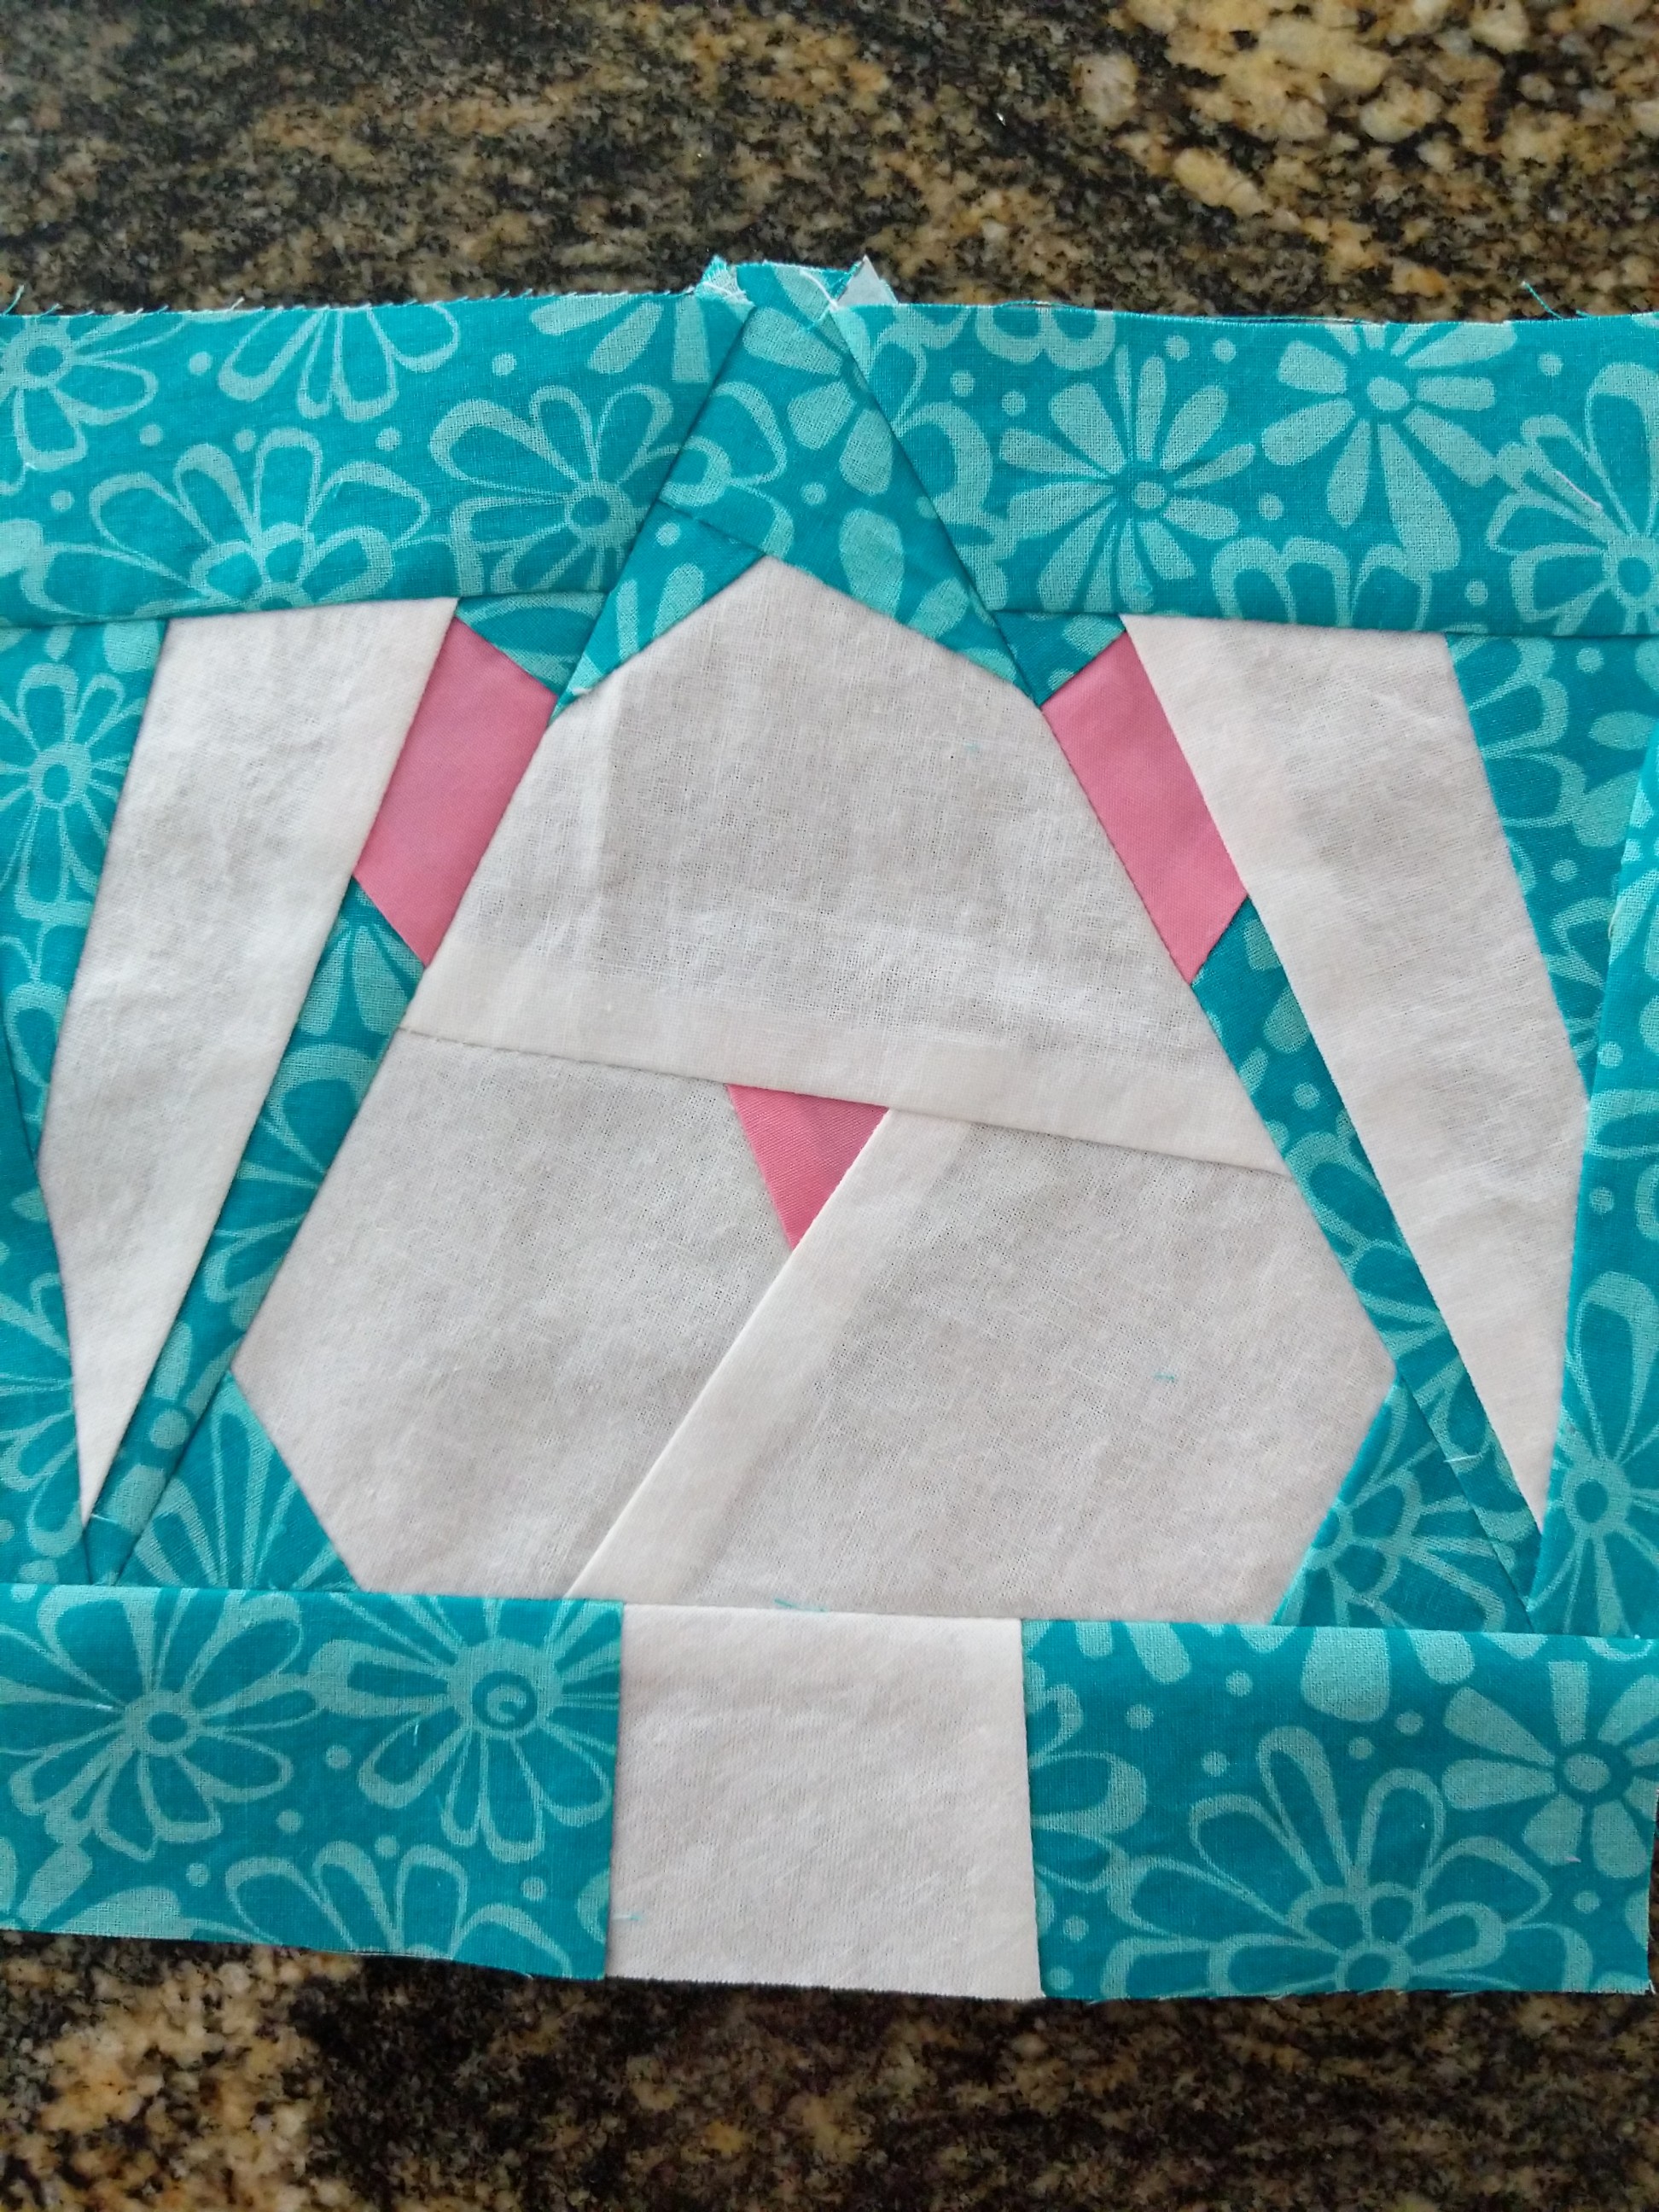
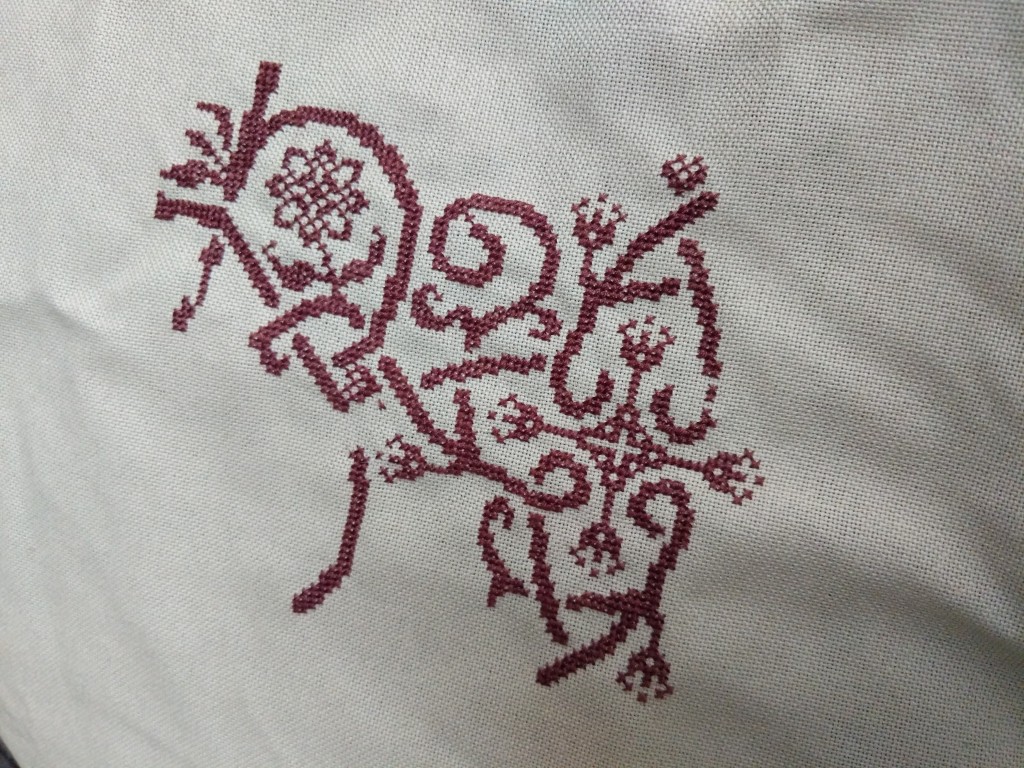
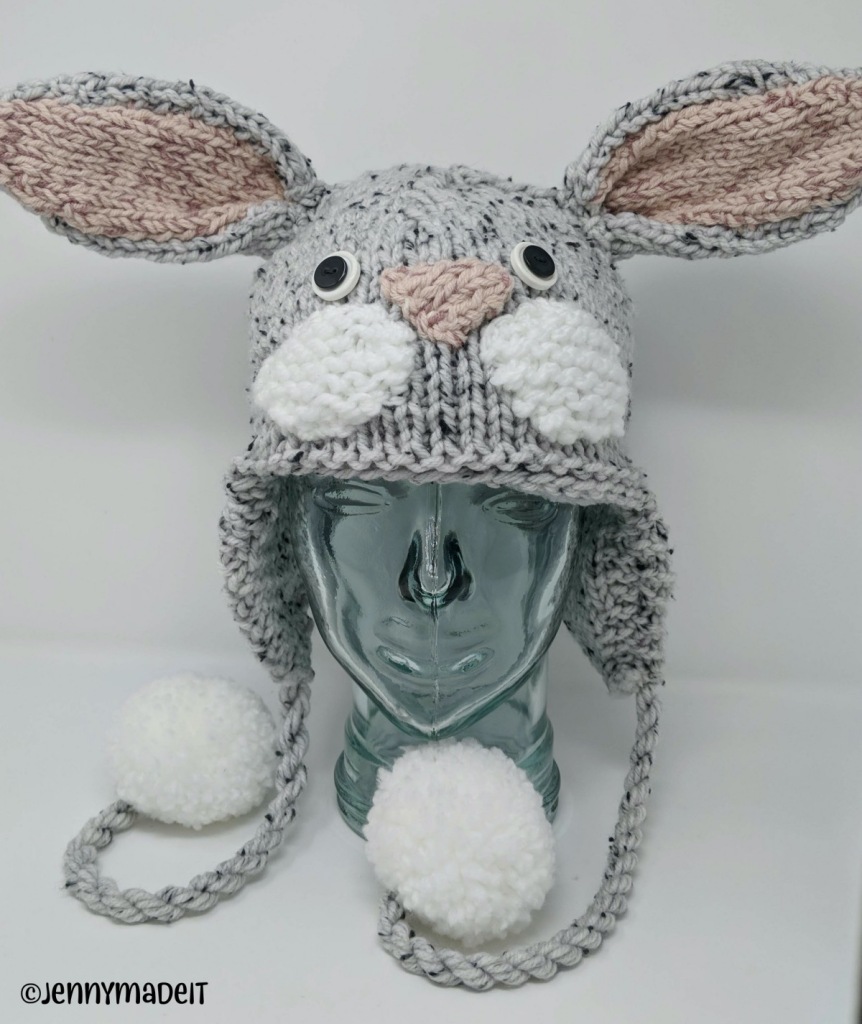
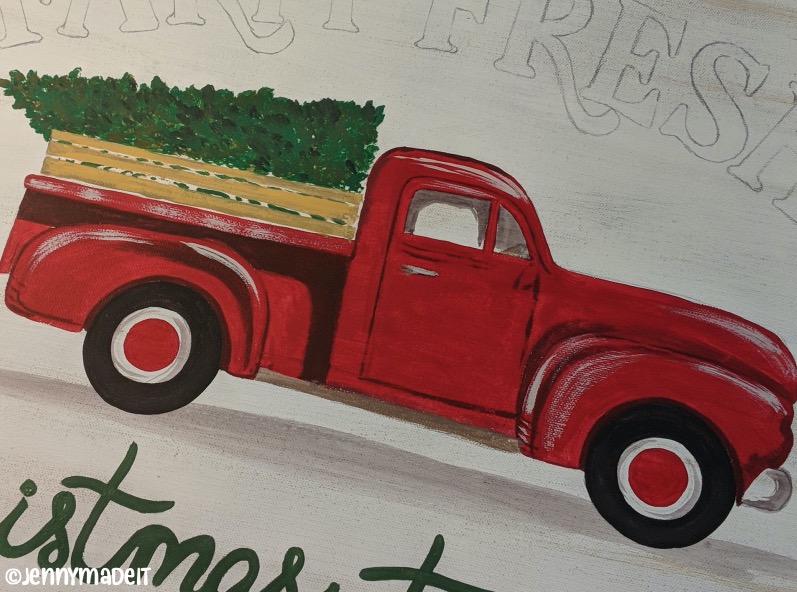
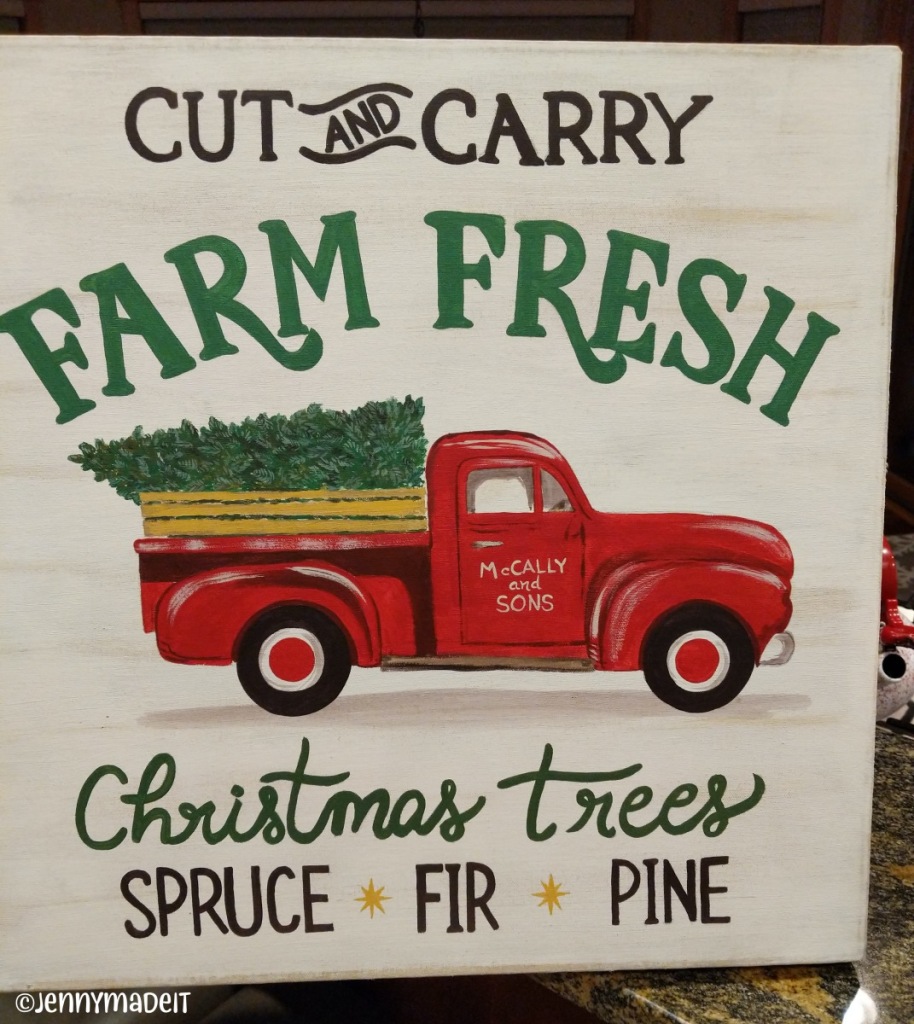
There is also a mystery project I’m working on that I cannot share much about at this time because it is going to be a birthday gift. Here’s a peek:

Next, I was looking through all the cross stitches I have begun and ignored for a while and pulled out this beautiful sampler called Oh My Bird by Teresa Kogut Creative Whims. This was one of those impulse purchases, and honestly, so many of the patterns I’ve purchased are impulse buys, usually from watching Flosstube! I have very little progress but I am enjoying stitching it. I am stitching this on 32 ct. Laguna that I purchased from Stitchville USA. I would say two strands of floss it a tiny bit tight on this count, but it could be the fact that the fabric is Lugana, and not the count. Anyway, I am going to love this so much when it is finished and hanging up in my house.

I had a dear friend stop by for a night on her way back from Canada, and she brought with her a partially finished cactus that she was making for her daughter. She needed help with it, and since I have years and years of crochet experience, I was able to finish the cactus and make two more from the book and kit she had. They are so adorable and I would definitely make more some time. There are many designs in the booklet and I have the yarn!

And lastly, I have been bit by the sewing bug since I had a role working with the local middle school on their spring musical, Beauty and the Beast Jr. I worked on lots of costumes. I really enjoyed it and so started looking for patterns for handbags and such and came across this pattern on Etsy, which I purchased. I have made two bags and here is the second one, which I am using daily. This is called the Madison Ave Mini Backpack by The Sew Fox. It has adjustable straps, a zipper pocket on the bag, a drawstring as well as magnetic enclosure, and an interior pocket. Her instructions were fabulous and I had a question about some part of the process and was able to reach her thru her Etsy shop and got a quick response. She is in the UK.

Finally, a word about seasons. It technically became spring here in Minnesota around March 20. However, we still had more than a foot of snow on the ground and bitter cold temps to go with it. Then we got another snowstorm for April Fool’s Day. It has been the longest winter I have every experienced and I was over it! We all were. Prior to the April snowstorm, our area had already seen 80 inches of total snow fall since the season began in late 2022. Sure, there have been many pretty days. I love a fresh coating of snow on the trees. But it just kept coming and staying cold. And we didn’t go anywhere for Spring Break so here we were….

I definitely have been crafting a lot because of the weather, and that’s ok with me. But now we are ready for warmer temps and for walks outside without the fear of slipping on the ice. Today it is unseasonably warm at 83 degrees but we are not complaining! Even the cats have been tired of being cooped up. Now they are enjoying the sun on our screened in porch. We are holding off on putting the cushions out because it’s supposed to get cold and rainy this weekend. Boo…

Thanks for stopping by! Hope you had a wonderful Easter and have a terrific spring.

The Smooch Sign

(I get no revenue from any products I mention. I simply mention products and stores to let you know where I got something and what it is.)

I love making a sign. And I seem to love making them the old fashioned way–painting them! Last year I painted this Christmas tree farm sign, and I just love it so much! It was a lot of work, but so worth it. The month before that, I did this sign, which goes above the window at my kitchen sink each holiday season. This year, after sighing and drooling all over Pinterest’s selection of yuletide bedroom decor, I decided to paint a sign for my bedroom.

First, I sketched out the word “mistletoe” in a fancy style. I just used pencil and sketchbook paper. I had to tape pieces of paper together to get the length of the lettering I needed for my canvas. I believe my canvas was 12″ by 36″.

Next, I used an Xacto knife to cut out the lettering, being careful not to completely detach the counter forms of letters.

Next, I prepared my blank canvas by mixing up some paint to give me a beautiful red finish. I didn’t purchase any paint for this project, but rather used what I had on hand, which is why I ended up using some fabric paint.

Now I was ready to paint the entire canvas red. After a good coat of paint, I used some white to blend in to give this base a more textured or rendered look.

I had to let the canvas dry overnight before using my paper stencil to paint the “mistletoe” lettering on. This was not as smooth as it could have been because my stencil was just sketchbook paper, not stencil plastic. I did spray a very light coating of adhesive onto the back of my paper stencil, to help keep it in place. Then I used a little sponge pouncer-type applicator to apply the white paint through the stencil. I knew the stenciling wouldn’t be perfect but that was okay because I do like to clean up the lettering with a paintbrush, which is what I definitely had to do until I was satisfied with the look of the sign.

Next up, I needed to get the words “MEET ME UNDER THE” very small at the top of the sign. I could have painted this on, but I realized I had purchased a used Sizzix die cut alphabet from a seller on eBay and I checked right away to see if the letters were the appropriate size, and they were! Woo hoo!

And ta-daah! Here is the finished sign, which I planned on hanging above my bed.

There are four square windows above my bed and I knew the sign would go in the center of this configuration but not cover any windows completely. My plan was to make little mistletoe wreaths (of course I saw some on Pinterest) to go in each of the end windows. I happened to have two small grapevine wreaths on hand, and plenty of kelly green felt. What I didn’t have was a lot of other shades of green and this was vital to give my little wreaths a more natural look. What I ended up doing was using my Sizzix die cutting machine to cut out lemon/lime shapes, which I then painted and trimmed to look like leaves. Sure, this was more labor-intensive than just heading to the store to get other shades of green felt, but I wasn’t sure if I’d even find the shades I needed. So I started mixing up some paint, and fabric paint was a good choice, as it remains flexible once dry. These painted felt shapes needed more dry time than I wanted (I can be impatient at times) but it was vital that I work with dry shapes to avoid getting my scissors and fingers coated in green paint.

To form the leaves, I simply pinched one end of the leaf then used a bit of hot glue to hold that in place. At first, I tried using floral stem wire to attach each leaf to the wreaths but realized it was going to take too much wire and too much time. So I simply attached the leaves onto the grapevine wreaths using more hot glue. I then added little white pom poms I had on hand.

When it came time to put the wreaths in the windows on either side of the mistletoe sign, I realized the scale was off. In other words, the little wreaths were too little. I needed to do something to remedy this and of course, I was unwilling to go buy bigger grapevine wreaths and go through the whole paint felt/dry felt/cut felt process again. So I had a little brainstorming session.

I decided to use more felt, in a flatter fashion to make the wreaths look bigger. It’s not a perfect solution but I think it works for my taste and my windows. I laid out a wreath on a green piece of felt and drew with a pencil some leaf shapes that basically outline the wreath but add a couple inches. I had one piece of a nice green felt that I wanted to use and it was not enough for both wreaths, so I cut it in half, and used half of it along with some kelly green felt for the base piece. Then I used scraps to cut more leaves and then placed them around in a way that I felt looked pleasing. I used my sewing machine and green thread to quickly attach the loose leaves to the leafy base. I then used thread to tack the new base to the grapevine leaves, as well as some hot glue. Here is the result.

I used 3M command hooks to attach the mistletoe sign to the woodwork in the very center of the windows, and used small command hooks to attach the wreaths right to the glass. And here is the finished look!

I am so pleased with how the mistletoe sign and the wreaths turned out! I do spend a lot of time looking at the pins I saved on Pinterest with these totally decked out holiday bedrooms. But I have to keep in mind how staged those rooms are, and I’m asking for trouble if I put an old fashioned sled at the foot of my bed along with steaming mugs of hot chocolate. My husband would break a leg and my white bedding would be destroyed! Instead, I had a little pencil-style Christmas tree near the large window (not shown) with just white lights. The cats would have treated ornaments on this tree as cat toys and I don’t want to get upset with them for being cats. I also put the three cone trees I made on one of my dressers atop a plain red dresser scarf, and a real planted pine tree plant. Oh and the two knit pillows that were super quick to knit up in bulky yarn. It was all just the right amount of Christmas cheer I needed in my room.

For next Christmas, I would like to make a simple quilt in traditional colors for my room. Stay tuned!

Thanks for stopping by to check out my projects! I hope you get some inspiration here!

Jenny

Much crafting

*please note there are no affiliate links in this blog post. I simply add links to patterns or tutorials that I used to make things.

Fall and winter of 2021 was a season of so much crafting for me! It was really fun and productive. Many projects were to spruce up my home for the holidays. There were also a few gifts made!

Starting from upper left corner, here is my finished Three Witches by Barbara Ana Designs. This was so fun to stitch and I finished it onto a board from Michael’s with some spooky ribbon, a wooden mushroom from Germany, some large rick rack, and mounted the stitching on a piece of chipboard with a fabric covered board behind it.

The next two photos are three punch needle ornaments from an issue of Punch Needle and Primitive Stitcher Magazine. I used floss I had on hand, including some fancy flosses and finished the ornaments with wool trim. I have a little pencil style artificial tree I keep up year round and I had it all decked out with autumn decor.

Middle row left is a photo of my spooky owl lantern, designed by Christopher Hiedeman. I love watching his YouTube videos, whether they’re about his beautifully decorated Victorian home or a tutorial on making something vintage-looking. I found his video on how to make this paper mâché looking owl and loved creating it. The eyes are so brightly colored in this photo because there is a battery operated tea light inside the lantern. It looks so neat on the front porch with other autumn decor.

In the very center of the collage is my finished and framed Feast of Friendship cross stitch by Blackbird Designs. I am in love with this piece and am so happy with the framing. I purchased the design and flosses at Stitchville USA in Minnetonka, MN and also had them do the framing. I had coffee-tea dyed the 28 ct. Monaco fabric myself and I’m very happy with the overall look of the piece.

Middle row right are two knitted ornaments I made. I have this wonderful book called Colorwork Creations: Knit Woodland Inspired Hats, Mittens and Gloves by Susan Anderson-Freed. I used the patterns for the cardinal and the nut hatch to make these little pillow ornaments.

The little heart ornament on the bottom left is just a creation I made after browsing thru Pinterest and seeing a similar felt and needlework ornament.

Bottom row middle pic is my finished Merry Chalkfull cross stitch which is one of several design collaborations between Priscilla Blain of Stitching with the Housewives and Cathy Haberman of Hands on Design. This was a gift for my mother-in-law. I’m trying to make all of the Chalkfulls for her.

And the last pic is of my Christmas tree cones made with poster board and yarn and some little pom poms. I see these in stores and I refuse to pay for something I can easily make on my own with supplies I have on hand. I did have to buy school grade poster board, as the only board I had was too heavy to be manipulated.

Seems like a lot of crafting, right? It was! But that wasn’t all. In my next post, I will go into detail how I made a painted sign for my bedroom for Christmas decorating.

Flying into fall like…

There are no affiliate links in this blog post. I simply add links so you can go to the sites where I got information, patterns or tutorials.

This is a photo of myself and a friend on a raft being towed by a boat on a lake. We are airborne above the water while looking frightened.

I was literally flying last week. Flying in a plane, then flying on a raft across a small lake in Michigan! I didn’t expect the latter type of flying but it was thrilling for sure! I don’t often experience a lot of thrills in my life, so it was a welcome experience.

I keep telling myself I have to get better at more consistent blogging. If I could be as consistent about blogging as I am about crafting, I’d be set! Today I’m going to share a few things I’ve made and also what I have plans to work on. As usual, I do have quite a few projects going at once, but I’ve also managed to complete quite a few things, one of which is a large project, one that I didn’t know if I would finish.

This is a photo showing part of me wearing a cardigan sweater I have knitted.
The Ribosome cardigan by Carol Feller at http://www.stolenstitches.com

This Ribosome cardigan caught my eye because of the cables that seem to be floating atop a striped garter stitch pattern. And the yoke cables are traveling horizontally while the body of the cardigan have them traveling vertically. I just loved it and knew it would be the most complex project I’ve ever attempted. When I attended the New York Sheep and Wool Festival in the fall of 2019, I purchased the yarn for it from Artisan Yarns. The yarn is a scrumptious baby alpaca from Hampden Hills Alpacas. The color brown is called Macho and the white is undyed natural white. The yoke is shaped using German short rows. The pattern is well-written and accomodates 7 difference sizes. I knit mine with a 48″ bust circumference. I love the way it turned out and it’s very warm. I’m looking forward to wearing it for some better photos this fall!

This is a photo of two knitted socks on blocking forms.
Simplicity Socks by Melissa Morgan-Oakes

I also managed to knit a pair of socks for myself this summer. I had purchased the yarn by Hedgehog Fibers over a year ago. This pattern, called Simplicity, is from the book Toe Up 2-at-a-time Socks by Melissa Morgan-Oakes. You can find the pattern in this book, and you can find the Ravelry link to the pattern here.

This is a photo of a glass head and neck displaying a Tunisian crochet cowl I made.
Tunisian Tubular Cowl by Beatrix Snyman

I also made two cowls for the Broadway Youth Center in Chicago. My dear friend, Sacha, has organized a drive to have knitters and crocheters make an infinity scarf or a cowl that will be given to LGBTQ+ youth in the area to keep them warm this winter. She has even procured beautiful superwash yarns that you can use to knit or crochet with. The first one, shown above, is Tunisian crochet. This is crocheted in the round with a double-ended Tunisian crochet hook. If you’d like to try the pattern, you can find it here.

This is a photo of a glass head displaying a knit neck warmer I made.
Phoenix Neck Warmer by Drops Design

The second one is the Phoenix Neck Warmer by Drops Design. Both of these were quite fast to work up. If you want to make a cowl or infinity scarf for this group, you still have time! Here is some information I found on Facebook to help you.

Happy Pride! We are looking for knitters and crocheters to gift 100 infinity scarves or cowls this holiday season to the LGBTQ+ youth at Broadway Youth Center, a program of Howard Brown in Chicago. All styles and yarn weights are welcome, but please use washable (super wash) yarns. Think: warm, cozy & comforting. We’re looking for a range of styles and colors — things that pop and more muted pieces. Feel free to include rainbow color and motifs. Drop off dates are week of Nov 28 at Knit 1 in Chicago (3856 N, Lincolnwood Ave) and Wool & Co. in S. Elgin, IL (1687 N. Lancaster Rd, South Elgin, IL)

This is a photo of a crocheted doily I made.
Capri Table Center doily from Magic Crochet, 1982

Look at this next little beauty. It’s a little crochet doily I made while helping my friend work out a crochet pattern drawn in diagram form. I really love the diagrams for crochet. This little one I made is called Capri table center from a 1982 edition of Magic Crochet. I used No. 20 Omega crochet thread and a 1.25mm steel crochet hook. It took a lot of pins to block it, but look at the result. I immediately put it in my hutch cabinet for safe keeping and display.

Next up is my Bohemian style fairy light chandelier crocheted using kitchen cotton, two embroidery hoops and the Solomon’s knot stitch. This was made for my tent! I’m going camping/glamping this month and really wanted to create some ambience for my little abode. I made this up as I went along, so sorry, but there’s no pattern. I added fringe at the bottom, and it was just what it needed. The lights are battery-operated so no need for electricity.

This is a photo of a Bohemian style chandelier I crocheted with off-white cotton yarn.
My Bohemian chandelier for “glamping”

And lastly, for completed projects, here are some Rustic Crochet Pumpkins I literally just made a day ago. I am making some fall decor for the group home where I volunteer. The home has two lovely stone fireplaces and mantels that would look so nice decorated for the fall season.

This is a photo of two crocheted pumpkins I made.
These pumpkins are crocheted but look knitted!

I found this pattern via Pinterest, which led me to Yarn + Chai, where a talented woman is designing and providing not only well-written patterns, but in some cases, very helpful video tutorials. Her name is Rebecca Langford and I will definitely be looking more into her site to see what else I “need” to make. I just love how these turned out. The larger brown pumpkin was more challenging because my yarn needle is considerably smaller than the height of the pumpkin so it was difficult to get it through the piece the several times required to shape the pumpkin. I believe a doll making needle will solve that problem. The larger pumpkin was crocheted with a bulky acrylic yarn by Knit Picks and the smaller one was made with a DK weight discontinued yarn by Mary Maxim. Don’t you love the cinnamon stick for the stem?

What’s coming up

I have recently gotten back to work on a Halloween cross stitch design I began last fall. I’m nearly finished and have run out of the Weeks Dye Works color Onyx. So I have to make a run to my local needlework store this week. I am also close to finishing Three Witches by Barbara Ana Design. I admit, I hadn’t worked on any needlework for months. For a while I was bit by the English paper piecing bug, then I went back to knitting and crocheting. But between these two designs and Feast of Friendship, which is to me a Thanksgiving design, I have plenty to complete for the season, and it’s all doable. All three of these were shown in this blog post.

Lastly, I am also very close to finishing this amazing crochet blanket called Mystical Lanterns by Janie Crow. I am so in love with this project. Here is a progress photo. I am using Cotlin yarn by Knit Picks. This is a DK weight yarn in cotton and linen. There are two or three colors of yarn in my blanket that are StyleCraft yarns I got on eBay. I only had one of each color but I’ve managed to include them in the overall project.

This is a photo of a crochet blanket in many bright colors that is nearly finished.
Almost finished!!

Well, I must sign off for now and get back to crafting. It’s a beautiful Labor Day Monday and I really want to set up my hammock between two trees and listen to the birds and the crazy squirrels running overhead. Thank you so much for stopping by! Happy crafting to you!

Jenny

English Paper Piecing, I love you!

There are no affiliate links in this blog post. I simply add links so you can go to the sites where I got information or tutorials.

Do you know what English paper piecing is? I have heard of it for a very long time, but admittedly avoided it, thinking it is something slow and clunky and out-of-date and I would never be interested in it. But then, I stumbled across something, I can’t even remember what, and then I was making hexagons. Firstly, I purchased two books for my Kindle reader. One is All Points Patchwork, and the other is Quilting on the Go. These books really helped me get started with EPP.

Here is my brief explanation of what English paper piecing (EPP) is: It is a method of joining shaped pieces of fabric together using shaped paper as a stabilizer into a piece of patchwork that is used as a quilt or other smaller project. So I found a free printable template of hexagons in various sizes, and I printed a page on regular printer paper, carefully cut out the hexies, then cut some fabric larger than the hexie, then using a needle and thread, I shaped the fabric around the hexie and secured it with some stitches. The paper remains in the fabric only until that shape has been joined with other shapes. Then you remove the paper. If you’re careful, you can reuse the paper.

Here is the first thing I made with EPP hexies. It’s a pin cushion! I absolutely love it. These fabrics came from the very first jelly roll I ever purchased. I didn’t know what I’d ever make with it, but I loved the fabrics. The fabric strips in this jelly roll were 2 1/2″ wide, so it definitely limits you as to what size hexagons you can make. But for these, it worked out great.

A hexie pin cushion!
Look at those adorable fabrics!
Cute as a bug

I also made smaller hexies and made this bag. The bag pattern is a free, wonderful tutorial by The Sewing Chick, found here. I have made a few of her zipper pouches in the past, but this is the first time I’ve ever incorporated EPP into one.

I am in love
It’s even lined! The Sewing Chick made a wonderful tutorial. I highly recommend you check it out!

Did I mention I was terrified of zippers? The tutorial helped me realize there really isn’t anything to fear.

Then I started making 60 degree diamonds to make these stars. Oh my stars. I am using a charm pack of fabric called 30’s Playtime by Moda Fabrics that I purchased from a private seller on eBay. Love them! Here is the first star I made.

Do you see the papers in the top of this photo? They have a hole in them to facilitate easier removal with a crochet hook.

I am making one star per day. Love them! I hope to incorporate these stars into a large stylish tote bag. I will likely use 60 degree diamonds in a white fabric to offset the stars.

Do you notice how crisp these shapes are? That’s because of the paper. In these stars, I used card stock instead of regular printer paper. I felt that the nature of the diamond needed a bit more substantial paper. Here is the back of a star.

In this photo, you can see my tack stitches. The stitches simply tack the folded fabric down without going through the paper templates. With larger shapes, your basting stitches will go through the fabric and the paper. This means when it’s time to remove the paper, you need to cut and remove your basting stitches. This step can be eliminated with glue basting, which I have yet to try. I have ordered a special glue pen for basting and should receive it soon.

There is something very therapeutic about English paper piecing. I suppose if I told myself I needed to make a queen sized quilt out of 1 1/2″ hexagons, I would be very turned off and not want to continue on. It sounds like it could be very monotonous and boring. I would likely give up, shove everything in a bag, and start something else. But what I love about this craft is the amount of control I have. Sometimes, I attempt to sew fabrics together on my machine, and I mess up. Or I make a quilt block and then look closely at it and all my mistakes I didn’t notice until things don’t line up. I find that very frustrating and discouraging. With EPP, I feel like because I am working by hand, I have so much control over how all these different pieces of fabric some together. Here are some other EPP things I have going on. I may not yet know what I’ll make with these, but I know I will make something because I really love the fabrics.

Thanks so much for stopping by! I hope you learned something new today and perhaps this post piqued your interest in English paper piecing. I look forward to stitching more pieces and exploring more complex designs.

Cool WIPs and Finishes

I’ve been terrible about blogging lately because I keep so busy working on various projects!

However, it is time that I took advantage of the WordPress app on my phone to assist me with some posts. So let this be my first post written and published on my phone.

The title of this post may confuse some people who are not makers of things. A WIP is a work-in-progress. And I have a lot of WIPs. Many people who do what I do also have WIPs in excess of 2 or 3. That’s why you’ll sometimes see a YouTube video titled WIP Parade or a blog post about WIPGO which I have never participated in, but stay tuned.

So today, on this gray and chilly Sunday, I will post about my WIPs. But first, let me share with you a few finishes that I’m very pleased with.

The blackwork embroidery shown here is my first ever. I stumbled upon the designs at The Steady Thread on Etsy, and purchased the pattern here called Deco Cornflowers. I tried this on 28 count Monaco fabric and completed nearly one side of the intricate border then it all fell apart because somewhere I miscounted and therefore made a mistake which threw off the entire thing. I tried fixing it by picking out the mistake but it led to confusion, anger, heartburn, and a general malaise so I put it in time out. And I realized that the designer called for Aida cloth, not an evenweave such as Monaco, so I began again. And this time, I began from the very center out, and voila! It was a pleasure to stitch and I ended up visiting The Steady Thread website and purchased 4 (eek!) more designs.

Next finish is this quilt, which is called a string quilt. I started this within the last 5 or 6 years when I lived in Illinois. It’s another first for me. I had never been involved in a string anything–quartet, theory, bikini–okay maybe string cheese but I digress. I pieced this quilt in Illinois and then neatly folded it and placed it in a corner of my closet. So here in Minnesota, I dug it out and went, gee, Jenny, it’s time to finish this quilt cuz it’s really pretty and very nearly finished! So I attempted to quilt it on my regular old sewing machine and I literally couldn’t even manage a straight line. So I just happened to mention this project to a crochet acquaintance and she said her mom had a long arm quilting machine and she would do it. So I shipped it off to Nebraska and probably started 10 more new projects, because that’s what I do!

When the quilt came back from Nebraska, I purchased some binding fabric (twice, because I used the first fabrics for yet another project). I made a non-bias binding because I needed the stripe to line up in a perpendicular fashion to the quilt and I finished it. And man oh man, I love it.

Next up is an Easter quilt that I started and finished within a very short amount of time for me. My mother-in-law was mentioning that she didn’t have a wall hanging quilt for spring or Easter so I decided to get to work planning one using fabrics from my dear friend and talented designer, Sharla, and other fabrics I purchased at Joann’s. I discovered the amazing foundation paper pieced designs by Made By Marney and purchased a few bunny poses. This was so fun to put together and quilt

Next up is a small foundation pieced and hand quilted project, also for Easter, for my dear friend. This was yet another bunny design by Made by Marney that I modified to have three dimensional ears and “grass” in the basket. This was really fun to make. I simply affixed a ribbon to make it into a little wall hanging.

One more finish is one of the Chalkfull cross stitch patterns by Priscilla of Stitching with the Housewives and Hands On Designs called Hip Hop. This is also for my mother-in-law who has already received two other Chalkfulls mentioned in a previous post.

Okay, now that we’ve gotten that out of the way, I present to you my cool WIPs…

Foundation pieced quilt blocks made years ago and now finally made i to a quilt top.
English paper pieced stars to be made into a large tote bag. I’m making one star per day with these 30’s Playtime fabrics by Moda.
English paper pieced hexagons to also be made into a tote bag.
The Bramble and The Rose by Inkcircles. This is my second start. More on that later.
Chalkfull design Bloom in progress for you guessed it, my mother-in-law. (She’s a lucky girl!)

I’m also working on Feast of Friendship by Blackbird Designs. I’m nearly finished but when I took it out to work on it last night, I realized I overstitched because that Dutch method of stitching is so nicely repetitive, I find I stitch more than I needed to. So I need to fix my error. I will have plenty of time to finish this and get it framed by Thanksgiving, which is my goal.

I have a few other cross stitch designs that have small starts but not a lot of talk about here. Basically my days lately have consisted of some English paper piecing, a little work on Bloom Chalkfull, and also work on the Inkcircles design as well as Feast of Friendship.

Next post I want to cover more in depth the English paper piecing I have only recently learned about. It’s so cool. It adds even more “cool WIPs” to my life.

Thanks for stopping by!

Hats off to 2021!

Gee, sorry it’s been so long since I posted on my blog! I have been tremendously busy creating things, from knit items, crocheted items, things with felt, and some cross stitch. Minnesota winters can be long and sometimes brutally cold, so what better thing to do than sit by the fireplace and stitch? I have enjoyed that so much, but honestly, I’m ready for spring. We had quite a number of days of below-freezing temperatures and while I don’t really have to go out in it, there are a few things each week I have to drive for. Let me just say: thank you for heated seats in my car. And a heated steering wheel. When it’s -10° out, you need to warm up that backside in a hurry.

I want to wish everyone a belated Happy New Year. I know we are all hoping that this year will be better for everyone in terms of Covid-related things. It will be so nice to sit and knit or crochet with people in person again. Currently, I have an online group which meets Sunday nights.

I have been working hard to increase the number of knit and crochet items in my Etsy shop. I do tend to make a lot of hats, hence the title of my post. Here is a montage of hats that I’ve made and some are for sale. Some are already sold.

This is a montage of photos of hats I have made.
Here is just a sampling of hats I’ve made!

I learned to do something new recently, and that is to sew linings for some of the hats. I always wanted to do this, but I was nervous and didn’t know where to begin. Then I realized that the book I have which contains the chicken hat, the panda, and the pig (there are several others too!) has instructions and templates for sewn linings. So I purchased some fleece and it was so much easier than I thought it would be. I have lined all the animal hats with warm fleece. Below is a photo of what the lining looks like.

This is a photo of a knit hat with a sewn in fleece lining.
Doesn’t this look warm and toasty? Perfect for this crazy winter weather.

This rabbit hat really took some time and effort but I am so pleased with how it turned out. For the pink inside the ears and the nose, I didn’t have a suitable pink in chunky form, so I used a worsted weight pale pink yarn held with a fine weight dusty rose color. I absolutely love the effect.

This is a photo of a rabbit hat.
I love how this hat turned out!

In terms of other crafts, I have made some things for the lovely ladies at the nursing home where I used to volunteer in person. It has been an entire year since I’ve been inside their home! I learned that some of the ladies I spent time with have passed on, and it saddens me, naturally, but even more so since many of their families were not able to spend time in person due to Covid. I try to make things to add some color and cheer to their surroundings. Since Covid changed all our lives, these ladies do not get to go on the outings they enjoy, like trips to our arboretum or the apple orchard.

This is a photo of a felt bouquet of flowers.
A pretty felt arrangement for the dining room table at the nursing home.
This is a photo of Valentine hearts with lady's names on them.
I look forward to meeting the newest residents!

For the felt bouquet, I used my Sizzix Big Shot die cutting machine with a die containing all the flowers. This was the first time I attempted to cut felt and it was a bit trial and error. I also didn’t assemble some of the flowers, especially the daisies, with the utmost precision. It was tricky and I was tired of burning myself with the hot glue gun. Sometimes, I used a needle and thread just to avoid the hot glue! I freehand cut green leaves to fill in. The pretty tin is from the dollar store in town, and I also grabbed some floral foam from there too and hot glued it in the bottom of the tin. I used green paper straws to attach the blooms. To make it easier to insert the straws into the foam, I simply cut the bottom of each straw on the diagonal to make it pointy.

For the Valentine hearts with the ladies’ names, I used the Sizzix with an alphabet die I purchased off someone on eBay, and I had another die with the flat floral shapes. I also dug through my assortment of buttons to add to the blooms. I cut all the leaves with scissors. For the fabric ruffle, I didn’t have any fabric that would look good, so I used the white muslin I had been using for face masks. What I did was I used a marker designed for making dots, and just stamped the fabric. Then I literally tore it into strips and gathered it while I glued it to the front of a piece of poster board cut in the same size and shape as the felt hearts. Then I glued the felt hearts over the top of the poster board so the ruffles raw edge is hidden inside, like a sandwich. I love the way these turned out. Plus, there’s something so satisfying about tearing fabric.

Well, this is all for now. I have so much more to show and talk about but I’ll wait a few days then do another post. I’m in my basement craft room and even though we are having a “heat wave” of 27 degrees right now (ha!) I am freezing.

Thanks so much for stopping by!

Late to the “red truck” party

Last year around the end of November, when I normally get my Christmas decorating done, I pulled out this seasonal dish towel and thought it would be a great thing to paint on one of the square canvases I had in my closet. So I photocopied the towel and then set it aside and did nothing that year. Then this year, I was cleaning up my desk and found the copy and I thought “I should really paint this, it’s cute!” And I’m only a zillion years late to the red truck party!

Have you noticed all the holiday things with red trucks? Once you start looking, it seems that they’re everywhere! Put “red truck” in the search field of Pinterest and wow. Just wow. I am a little surprised I didn’t see toilet tissue with red trucks, but I digress.

Photo collage of a seasonal dishtowel with a red truck design, and photocopies of the image used to enlarge it.

I had to enlarge the photocopy 300% to have it fit nicely on the square canvas, which was about 18″ square. (I’m sitting in my family room, writing this blog post, and I cannot be bothered to get up and measure the painting 😆) It was a little fiddly to enlarge the image on my outdated desktop printer/scanner. But I managed to get all of the image and then used my portable light table to line up the images and tape them together.

Photo collage of the image enlarged 300%

Next, I painted the blank canvas with some golden yellow chalk paint with a little brown acrylic paint mixed in. This would not be the actual background color. This was just an undercoat.

Photo collage showing the golden yellow color being painted on the canvas.

When that was all dry, I painting over the entire canvas with flat house paint I had in the basement. It is Antique White. When that top coat dried, I used some sandpaper to distress the white finish and have some of the golden yellow base coat show through.

Next, I used the “old school” transfer method I talked about in this blog post to transfer the image onto the newly painted canvas. This took some time. And during this process, it became evident that the image had become slightly distorted due to the enlarging process. I had to cut and re-tape some portions of the image to straighten them.

Photo collage showing how I transfer the design to the canvas.
In this photo collage, you can see how the white over the golden yellow turned out on the canvas.

At this point in the project, I got pretty geeked about this whole thing. I couldn’t wait to start painting.

Photo of pencil outlines of the design on the canvas.
I really wanted to get painting!
Photo showing the letter painting process on the canvas.
Instead of using a true black paint, I chose a craft paint color called Warm Black.
Photo of the red truck, all painted.
It’s all downhill from here! The truck got a little distorted in the enlarging process but I think I made it work ok.

At this point, I should tell you that I was using the black and white copy of the dishtowel to go by. I completely forgot to look at the actual dishtowel, which was in color, and could have helped me. I was looking at examples of red truck designs with these tree farm type phrases on them to get ideas for the colors for the lettering. I decided to go with this scheme shown in photo below, and then I made the colossal mistake of asking my family what they thought.

Photo of the finished canvas, but with some questionable color choice
I was pretty happy with it! For a while…

Two of the four members of my household chimed in with their opinions, which I supposed I did ask for in a round about way. In the end, I decided to tone things down a bit by changing the Farm Fresh phrase to the Warm Black color rather than the green. I’m glad I did.

Photo of the finished Farm Fresh Christmas tree sign.
Yay!

I’m really glad I did this project this year. I see things like this in the store and what keeps me from making the purchase is knowing I can make the thing myself, and usually without buying extra materials. I had the blank canvases from when I thought I was going to paint more. I always have some paint on hand. Most importantly, I usually have the time. And if I don’t have the time, I make it, simply by not cleaning my house or not doing laundry for a few days! It’s pretty straightforward. Listen family, do you want home decor or do you want clean underwear?

(Don’t answer that…)

Thanks so much for stopping by! We are getting closer to Christmas and I have been so busy with projects, but it really makes me happy. 😀 I hope you’re doing well and feeling happy, too.

Jenny

Paint-by-number purgatory

At the beginning of quarantine, I was scrolling thru Instagram and saw an ad for a paint-by-number thing where you upload a photo of your pet, and this company turns it into a project you’ll regret ever starting.

So I bought into it. And it took weeks and weeks for the kit to arrive. It took so long, that I figured it was a scam and I was out $46. (I know, right?!) After emailing the company, I learned that due to all the new shutdowns last Spring, they were behind on orders and if I could just be patient. I AM a very patient person, and also easily distracted, so I waited. And forgot about it.

Then the paint-by-number kit finally arrived, and I was immediately hit with one part excitement and one part horror. Why did I order this? Why did I choose that particular photo? To answer the first question, you only need to recall that everything in the world shut down, kids were no longer going to school, and I didn’t know how many more family games of table tennis I could endure. Also, I have a painting of our older cat, Princess, from a paint-and-drink-cocktails place that I completed several years ago. As for the second question, well, the photo I chose of Dewey, our young rescue kitty, was so darn cute and he looks so handsome, I had to choose it!

I began painting, and I made sure I did this at the dining room table where my two artistic boys could see and be inspired to help me finish it. Sneaky, right? (They don’t consider themselves artistic but they really are!)

Collage of two photos of a paint-by-number of my cat.

I worked and worked on this project in between other projects, like various knitting and crochet things, and eventually I got so close to finishing that I…..stopped working on it. It languished on the dining room table until I moved it to the floor of my craft room, where it languished further and completely lost its appeal.

But I finally picked it up one day a few weeks ago determined to finish it. But I knew it needed to be fixed because somewhere in the zereos and ones of software that converts photos into near-impossible paint-by-number kits, it determined that some shadowing in Dewey’s white fur should be mauve, and not just a sliver here and there, my cat looked like he was wearing a auto racing jump suit. It was bad. Everyone agreed. You can also feel free to agree by viewing this photo. He looked like the Trans Van of cats. (I thought these vehicles were super cool when I was a kid!)

Collage of images of a 1970's era Trans Van recreational vehicle and the paint-by-number of my cat with an unfortunate swath of mauve paint.

I changed out the mauve for a more reasonable shade of cat, and voila! Finished. I wrapped the canvas painting around a canvas on stretcher bars I had lying around and now I can look at it, admire it, and always be reminded that impulse purchases are usually not the best idea.

I hope you enjoyed this little story of impulse, regret and persistence. I can honestly say I never want to do another paint-by-number again. But maybe you’ll give it a try! Just be careful what photo you choose. The amount of detail in this painting just about did me in.

Have a wonderful day! –Jenny

“Wood” ya call me crazy?

I’m not sure how it is where you live, but where I live, in Minnesota, you almost cannot find a winter planter without birch logs in it. Birch trees are plentiful in Minnesota, and truth be told, I have always loved the look of a birch tree or birch bark anything. In fact, I still have a mug I bought probably 30 years ago at a Cracker Barrel restaurant. I used to drink my coffee out of it, but it isn’t the greatest drinking mug, as the lip of it isn’t quite right. It makes a great holder for my crochet hooks, though.

Anyhow, I have admired the winter planters from my neighbors’ front porches, to the local shops in my town. There’s something about the white logs against darker tones of greens, golds and reds. It’s so festive yet natural! But because I’m a bit of a cheapskate, I have refused to purchase birch logs for my own planters. You might even say I grew to hate the sight of them, because they are literally everywhere and I just couldn’t make the purchase. So I had an idea.

On the surface, my idea sounds kind of dumb, I admit it. But many times, I go with a dumb idea, and am surprised with either how good the idea was, or just how ridiculous! And I’m sure I looked, um, interesting as I dragged a huge fallen branch I found on the middle school field to my back yard where I hacked it up into manageable “planter” sized logs. I couldn’t tell you what type of tree it was, but it was not birch, maple or oak.

Photo of cut branches
Logs!

I knew I wanted to paint these logs and turn them into “birch”, but I didn’t have that amount of white craft paint, and I wasn’t ready to buy more, so I rummaged through the storage area of my basement where I knew many cans of house paint were left for us. I used interior latex flat paint in Antique White to put a nice base coat of white on the logs, then I used some craft paints in gold and brown and black to “birchify” them. I used Google to find images of birch logs as my guide, as I transformed these basic branches into something I can hopefully reuse for a few years.

Photo of branches painted white
Antique White latex paint
Photo of one branch painted to resemble a birch log
This log-painting adventure is quite therapeutic!
Photo of several branches painted to resemble birch logs
They might be a bit too gold here.
Another photo of logs painted to resemble birch logs
Yep, I need to tone down that gold color.

I found the best way to get the black marks was to use a piece of stiff cardboard and dip the edge in my black paint, then “imprint” the black onto the log, while turning the log so the straight cardboard could make a mark on a round surface. Then I found that tapping the cardboard on the log in areas gave me some dot-dash patterns that make the logs look realistic. I also found I went a little heavy on the gold and toned it down in some areas.

I ended up with six good logs, three for each planter on my front porch. I think they look nice! I’m happy with them, and I will store them in the garage or basement in the off-season and bring them out next year. Since I painted these “free” logs with supplies I had on hand, my investment was my time, and not my money. The birch logs sell for about $4.99 each. That would’ve been $30 for my two planters. Instead, I purchased these pre-bundled greenery packs at Home Depot for my planters. Last year, I literally went around my yard and trimmed pieces off some evergreens and also some arborvitae.

Photo of a Christmas planter with greenery, pine cones, red berries and my painted birch logs.
Ta-da!! One of my two finished planters.

Thanks for stopping by! I have another big project to write about so stay tuned! For now, I have to get to bed. I am making all my Christmas cards by hand this year, so I plan on getting an early start tomorrow.

Jenny